2017年5月7日 星期日

Swift3 AlertController 的一些基本運用

今天要來寫AlertController的一些運用,使用都是原生的Code,在iOS9以後apple要求使用AlertController,在這之前大家都是使用已經停的AlertView。如果你遇到要使用的情況建議使用AlertController唷!畢竟官方已經停用AlertView
有一個小小的提醒就是當您在練習時記得不要將AlertController寫在viewdidLoad因為可能會沒顯示出來,建議使用一個button或是在比viewdidLoad晚執行的時候處理

一般的AlertController建立

 let alertController = UIAlertController(title: "建立Alert", message: "建立成功了唷!", preferredStyle: .alert);
        //建立AlertAction,如果再按下Action後要做動作就將print的位子寫入你要的動作,像取消通常沒做動作可將handler帶入nil即可
        let alertActionOK = UIAlertAction(title: "確定", style: .default, handler: {
            action in
            print("寫入你要的動作");
        });
        let alertActionCancel = UIAlertAction(title: "取消", style: .destructive, handler: nil);//style通常都是使用default,如使用.destructiveaction會直些顯示紅色
        
        alertController.addAction(alertActionOK);//AlertController加入確定鈕
        alertController.addAction(alertActionCancel);//AlertController加入取消鈕
        //顯示出AlertController的方法有下面兩種。
        self.present(alertController, animated: true, completion: nil);

//        self.show(alertController, sender: nil);


改變AlertController的背景色

 let alertController = UIAlertController(title: "背景色?", message: "改變背景色", preferredStyle: .alert);
        //加入背景色
        let firstView = alertController.view.subviews.first;
        let backView = firstView?.subviews.first;
        for subview in (backView?.subviews)!{
            subview.backgroundColor = UIColor.yellow;
            subview.layer.cornerRadius = 10.0;
            subview.alpha = 1;
        }
        
        let alertActionOK = UIAlertAction(title: "確定", style: .default, handler: nil);
        alertController.addAction(alertActionOK);
        self.present(alertController, animated: true, completion: nil);


改變AlertAction的文字顏色

let alertController = UIAlertController(title: "Action顏色", message: "改變Action顏色", preferredStyle: .alert);
      //這行是兩個Action顏色都改一樣
//        alertController.view.tintColor = UIColor.brown
        
        let alertActionOK = UIAlertAction(title: "確定", style: .default, handler: nil);
        //改變ActionOK的顏色為橘色
        alertActionOK.setValue(UIColor.orange, forKey: "titleTextColor");
        
        let alertActionCancel = UIAlertAction(title: "取消", style: .default, handler: nil);
//        改變ActionCancel的顏色為綠色
        alertActionCancel.setValue(UIColor.green, forKey: "titleTextColor");
        
        alertController.addAction(alertActionOK);
        alertController.addAction(alertActionCancel);
        self.present(alertController, animated: true, completion: nil);


改變AlertController的Title文字顏色

 let alertController = UIAlertController(title: "Title顏色改變", message: "預設顏色為黑色唷!改為紅色了", preferredStyle: .alert);
        let myTitleString = NSMutableAttributedString(string: "Title顏色改變",
                                                      attributes: [NSFontAttributeName:UIFont(name: "Georgia", size: 18.0)!]);
        myTitleString.addAttribute(NSForegroundColorAttributeName,
                                   value: UIColor.red,
                                   range: NSRange(location: 0,
                                                  length: "Title顏色改變".characters.count));
        
        alertController.setValue(myTitleString, forKey: "attributedTitle");
        
        let alertActionOK = UIAlertAction(title: "確定", style: .default, handler: nil);
        alertController.addAction(alertActionOK);
        self.present(alertController, animated: true, completion: nil);


改變AlertController的Message文字顏色

 let message = "改變訊息的顏色變為橘色了喔!"
         let alertController = UIAlertController(title: "Message顏色改變", message: message, preferredStyle: .alert);
        let messageMutableString = NSMutableAttributedString(string: message, attributes: [NSFontAttributeName:UIFont(name: "Georgia", size: 15.0)!]);
        messageMutableString.addAttribute(NSForegroundColorAttributeName,
                                          value: UIColor.orange,
                                          range: NSRange(location: 0, length: message.characters.count));
        
        alertController.setValue(messageMutableString, forKey: "attributedMessage");
        
        let alertActionOK = UIAlertAction(title: "確定", style: .default, handler: nil);
        alertController.addAction(alertActionOK);
        self.present(alertController, animated: true, completion: nil);


AlertController中加入TextField

 let alertController = UIAlertController(title: "加入textField?", message: "下方有TextField", preferredStyle: .alert);
        alertController.addTextField(configurationHandler: {(textField : UITextField!) -> Void in
            textField.placeholder = "請輸入文字"
            //怎麼運用看個人了喔!如果想要鎖定字數之類的請慘考此篇http://h81061678.blogspot.tw/2016/12/swift3-alertaction.html
        });
        let alertActionOK = UIAlertAction(title: "確定", style: .default, handler: nil);
        alertController.addAction(alertActionOK);

        self.present(alertController, animated: true, completion: nil);


以上的用法希望能夠對大家有幫助唷!

2017年3月7日 星期二

swift3 TextField監控決定UIButton的動作或顏色

最近剛好遇到設計如果欄位是空的話就將Btn顯示一個顏色,如果用戶輸入了文字後有內容了在改變顏色,這邊直接附上code做兩種不樣的功能,上面屬於Btn變色,下面屬於鎖住Btn
不多說直接附上code跟模擬畫面

import UIKit

class ViewController: UIViewController,UITextFieldDelegate,UITextViewDelegate {
    
    var singleFingerTap:UITapGestureRecognizer!
    var text1Bool:Bool!
    
    
    @IBOutlet weak var textfield1: UITextField!
    
    @IBOutlet weak var textfield2: UITextField!
    
    @IBOutlet weak var btn1: UIButton!
    @IBOutlet weak var btn2: UIButton!
    
    override func viewDidLoad() {
        super.viewDidLoad()
        // Do any additional setup after loading the view, typically from a nib.
        //監聽鍵盤動作
        NotificationCenter.default.addObserver(self, selector: #selector(keyboardWasShown), name: NSNotification.Name.UIKeyboardWillShow, object: nil);
        NotificationCenter.default.addObserver(self, selector: #selector(keyboardWasHidden), name: NSNotification.Name.UIKeyboardWillHide, object: nil);
        singleFingerTap = UITapGestureRecognizer.init(target: self, action: #selector(handleSingleTap));
        
        self.textfield1.delegate = self
        self.textfield2.delegate = self
        textfield1.clearButtonMode = .always
        textfield2.clearButtonMode = .always
        btn1.backgroundColor = UIColor.red
        btn2.backgroundColor = UIColor.gray
        btn1.tintColor = UIColor.white
        btn2.tintColor = UIColor.white
        text1Bool = false
        
        textfield1.addTarget(self, action: #selector(text1(textfield:)), for: .allEditingEvents)
        textfield2.addTarget(self, action: #selector(text2(textfield:)), for: .allEditingEvents)
    }
    func btn1c(){
        if (text1Bool == true){
            btn1.backgroundColor = UIColor.brown
        }else{
            btn1.backgroundColor = UIColor.red
        }
    }
   
    func text1(textfield:UITextField){
//        if ((textfield.text?.characters.count)! < 2){
        if (textfield1.text != ""){
            text1Bool = true
        }else{
            text1Bool = false
        }
        self.btn1c()
    }
    func text2(textfield:UITextField){
       self.btn2.isEnabled = (textfield.text?.characters.count)! > 2
        
    }


    override func didReceiveMemoryWarning() {
        super.didReceiveMemoryWarning()
        // Dispose of any resources that can be recreated.
    }
    
    //MARK: 鍵盤監聽動作(當用戶點view收起)
    func keyboardWasShown(){
        self.view.addGestureRecognizer(singleFingerTap);
    }
    func keyboardWasHidden(){
        self.view.removeGestureRecognizer(singleFingerTap);
    }
    func handleSingleTap(){
        //Do stuff here...
        textfield1.resignFirstResponder()
        textfield2.resignFirstResponder()
    }


    @IBAction func Btn1(_ sender: Any) {
        print(textfield1.text!)
    }
    @IBAction func Btn2(_ sender: Any) {
        print(textfield2.text!)
    }

}


希望能夠幫助到有需要的朋友們唷^^
雖然手法有點粗操,有更好的方法歡迎提供!


2017年2月8日 星期三

Swift3 使用MD5

MD5的應用,花了一點點小時間參考別人的文章而做出來的
一開始做的時候看到大家都說要引入
#import <CommonCrypto/CommonDigest.h>
我一開始想說直接在swift內呼叫,發現怎麼樣都叫不到
後來想到MD5應該屬於C,所以這邊使用swift的朋友們別忘了建立橋接
橋接建立方法最偷懶最方便的方法建立cocoa touch class 將語言改成OC
然後按確定後會顯示下圖
 記得要按下建立橋接如下圖
 建立好後會如下圖
這時候在橋接內引入 #import <CommonCrypto/CommonDigest.h>
小提醒:如果OC的class沒用到可以刪掉沒關係,
因為我們只是方便建立橋接省去麻煩
然後建立一個新的swift file
我個人這邊檔名直接設定為MD5而程式碼如下
import Foundation

extension String {
    func md5() -> String {
        let str = self.cString(using: .utf8)
        let strLen = CUnsignedInt(self.lengthOfBytes(using: .utf8))
        let digestLen = Int(CC_MD5_DIGEST_LENGTH)
        let result = UnsafeMutablePointer<CUnsignedChar>.allocate(capacity: digestLen)
        CC_MD5(str!, strLen, result)
        let hash = NSMutableString()
        for i in 0 ..< digestLen {
            hash.appendFormat("%02x", result[i])
        }
        result.deinitialize()
        return String(format: hash as String)
    }
}
最後直接在viewcontroller.swift的viewdidload內測試摟
你可以建立一個string或者是直接print
let string = "123456"
        print(string.md5())
        print("MD5測試".md5())

測試出來結果如下
e10adc3949ba59abbe56e057f20f883e
ee4580a7e015144cbfaa8ba05f742cba

可以到線上的測試網站測試看看喔!!

2017年1月25日 星期三

swift3 使用原生播放器AVPlayerViewController

這邊不多說了,直接附上Code給大家參考
而程式碼裡面會看到有三個button
第一個PlayBtn所使用的方法是直接開啟AVPlayerViewController做播放
並且要自行在點擊播放(如需自動播放加入.play()即可)
第二個InViewBtn所使用的方法是在storyboard裡面建立一個View(自訂大小)然後將AVPlayer放入View裡面並且直接自動播放player.play()
第三個就是將在view內播放時可按暫停
其他深入的小功能就靠大家自行摸索摟~

//
//  ViewController.swift
//  AVPlayer
//
//  Created by John on 2017/1/23.
//  Copyright © 2017 John. All rights reserved.
//

import UIKit
import AVKit
import AVFoundation

class ViewController: UIViewController {
    
    @IBOutlet weak var UrlText: UITextField!
    @IBOutlet weak var PlayerView: UIView!
    var player:AVPlayer!
    var Bool:Bool! = false
    override func viewDidLoad() {
        super.viewDidLoad()
        // Do any additional setup after loading the view, typically from a nib.
        
    }
    
    override func didReceiveMemoryWarning() {
        super.didReceiveMemoryWarning()
        // Dispose of any resources that can be recreated.
    }
    
    @IBAction func PlayBtn(_ sender: UIButton) {
        
        let url = URL(string: UrlText.text!)

        player = AVPlayer(url: url!)
        let playerViewController = AVPlayerViewController()
        playerViewController.player = player;
        self.present(playerViewController, animated: true, completion: nil)
        //  player.play()
        
    }
    
    @IBAction func InViewBtn(_ sender: UIButton) {
        let url = URL(string: UrlText.text!)
        player = AVPlayer(url: url!);
        let playerLayer = AVPlayerLayer(player: player)
        playerLayer.frame = self.PlayerView.bounds
        self.PlayerView.layer.addSublayer(playerLayer)
        player.play()
        Bool = true
    }
    @IBAction func Player(_ sender: UIButton) {
        
        if Bool == true{
            player.pause()
            Bool = false
        }else{
            player.play()
            Bool = true
        }
        
    }
}


大致架構就這樣。。影片流自行收尋吧^^

2016年12月25日 星期日

Swift3 簡單的鍵盤監控及AlertAction凍結

這邊就不多做解釋了,直接放上Code跟截圖跟大家分享!!


storyboard自行發揮摟~而我為了呈現會擋住textfield所以我故意放比較低

在這要比較注意的是,通常大多數會擋住textfield是因為沒有使用tableview
物件無法滑動的情況下就變成必須改變view的座標,但以下寫法並不適合過多欄位使用。


import UIKit

class ViewController: UIViewController ,UITextFieldDelegate{

    @IBOutlet weak var ShowInputLabel: UILabel!
    @IBOutlet weak var YouerTextField: UITextField!
    @IBOutlet weak var AlertTextLabel: UILabel!
    
    var singleFingerTap:UITapGestureRecognizer!
    var alert:UIAlertController!
   
    override func viewDidLoad() {
        super.viewDidLoad()
        
        self.YouerTextField.delegate = self

        //鍵盤監聽
        NotificationCenter.default.addObserver(self, selector: #selector(ViewController.keyboardWasShow), name: .UIKeyboardWillShow, object: nil);
        NotificationCenter.default.addObserver(self, selector: #selector(ViewController.keyboardWasHidden), name: .UIKeyboardWillHide, object: nil);
        singleFingerTap = UITapGestureRecognizer.init(target: self, action: #selector(handleSingleTap));
        
        
    }

    override func didReceiveMemoryWarning() {
        super.didReceiveMemoryWarning()
        
        NotificationCenter.default.removeObserver(self)
        // Dispose of any resources that can be recreated.
    }
    
    @IBAction func AlertBtn(_ sender: UIButton) {
         alert = UIAlertController(title: "Alert", message: "輸入下方欄位", preferredStyle: .alert);
        //加入textfieldalert
        alert.addTextField { (text:UITextField) in
            text.placeholder = "輸入"
           //監聽
            NotificationCenter.default.addObserver(self, selector: #selector(ViewController.alertCheck(notification:)), name: .UITextFieldTextDidChange, object: text);
        }
        let alertAction = UIAlertAction(title: "OK", style: .default) { (UIAlertAction) in
            self.AlertTextLabel.text = self.alert.textFields?.first?.text
            //釋放間聽
            NotificationCenter.default.removeObserver(self, name: .UITextFieldTextDidChange, object: nil);
        }
        
        alertAction.isEnabled = false//凍結OK
        alert.addAction(alertAction)
        self.present(alert, animated: true, completion: nil);
    }
    //凍結action(監控)
    func alertCheck(notification:Notification){
        alert = self.presentedViewController as! UIAlertController?
        if(alert != nil){
            let input = (alert.textFields?.first)! as UITextField
            let alertActionOK = alert.actions.last! as UIAlertAction
            //計算字元到多少未解凍
            alertActionOK.isEnabled = (input.text?.characters.count)! > 5
        }
    }
    
    @IBAction func OutPutBtn(_ sender: UIButton) {
        ShowInputLabel.text = YouerTextField.text
    }
//MARK: 鍵盤監聽動作(點view隱藏鍵盤)
    //鍵盤顯示
    func keyboardWasShow(notification:Notification){
        self.view.addGestureRecognizer(singleFingerTap)
        
        //獲取鍵盤高度
        let info = notification.userInfo!
        let keyboardFrame: CGRect = (info[UIKeyboardFrameEndUserInfoKey] as! NSValue).cgRectValue
        let hieght = keyboardFrame.height
        //改變view座標避免鍵盤擋到textfield(注意:欄位多時不適用)
       self.view.frame.origin.y = -hieght
    }
    //鍵盤收起
    func keyboardWasHidden(notification:Notification){
        self.view.removeGestureRecognizer(singleFingerTap)
        self.view.frame.origin.y = 0
        
    }
    func handleSingleTap(){
        YouerTextField.resignFirstResponder()
    }
    //MARK: 鍵盤按下return後的動作
    func textFieldShouldReturn(_ textField: UITextField) -> Bool {
        textField.resignFirstResponder()
        if(textField.text != ""){
            self.OutPutBtn(.init(type:.custom))
        }
        //假設如果有多個欄位要動作時
        /*if(textField.isEqual("第一個欄位")){
            YouerTextField.becomeFirstResponder()//第二個欄位
        }else{
            self.OutPutBtn(.init(type:.custom))
        }*/
        
        return true
    }


}

出來的效果如圖:


2016年12月6日 星期二

swift 多國語系(國際化)

這做法步驟比較多一點,將以圖文解釋。。。
建議先做英文版,畢竟是國際通用語言
再來就是在專案完成後最後在做國際語言,雖然在某些地方會麻煩點。但是storyboard才不用一個一個自己建立ID,主要順續就看個人習慣摟~

選到專案Info下方有個Locallizations,點選下方+選擇你要加入的語言


選擇後會是這樣的(勾起表示要建立多國語系)


建立完成會顯示你所做的語系

再來建立Strings File


命名方式看你個人喜歡摟~


建立完成後會是這樣,這時左邊欄有個Localize...點下去


因為一開始做的語系是預設語系(英文)所以這邊不動他直接建立


建立後將右邊欄位所要增加的語系勾起後如右下圖所示會多出兩個檔案


勾起來後檔案多出外記得去檢查前面所新增的語系跟原本的語系有沒有多一個監控
原本為2 Files Localized要變成3 Files Localized
這樣才能確保code裡面所做的多國語系有用途喔!


下圖是storyboard得多國語系(預設語系為原先就製作好的storyboard)
以下為增加語系要做的動作


接下來要介紹的是如果code內使用多國語系


當然不是做好上方就好拉!!!除了APP名稱其餘都是透過code來詮釋如下:

 override func viewDidLoad() {
        super.viewDidLoad()
       
       //呼叫多國語系
        let labelLanguage = NSLocalizedString("Language", tableName: "InfoPlist", bundle: Bundle.main, value: "" , comment: "");
        //"Language"自訂一個key"InfoPlist"所建立的Strings Flie名稱
        
        //建立label
        let label:UILabel = UILabel(frame: CGRect(x: self.view.frame.size.width/2, y: 200, width: 100, height: 30));
        label.text = labelLanguage//帶入多國語系的值
        self.view.addSubview(label);
    }
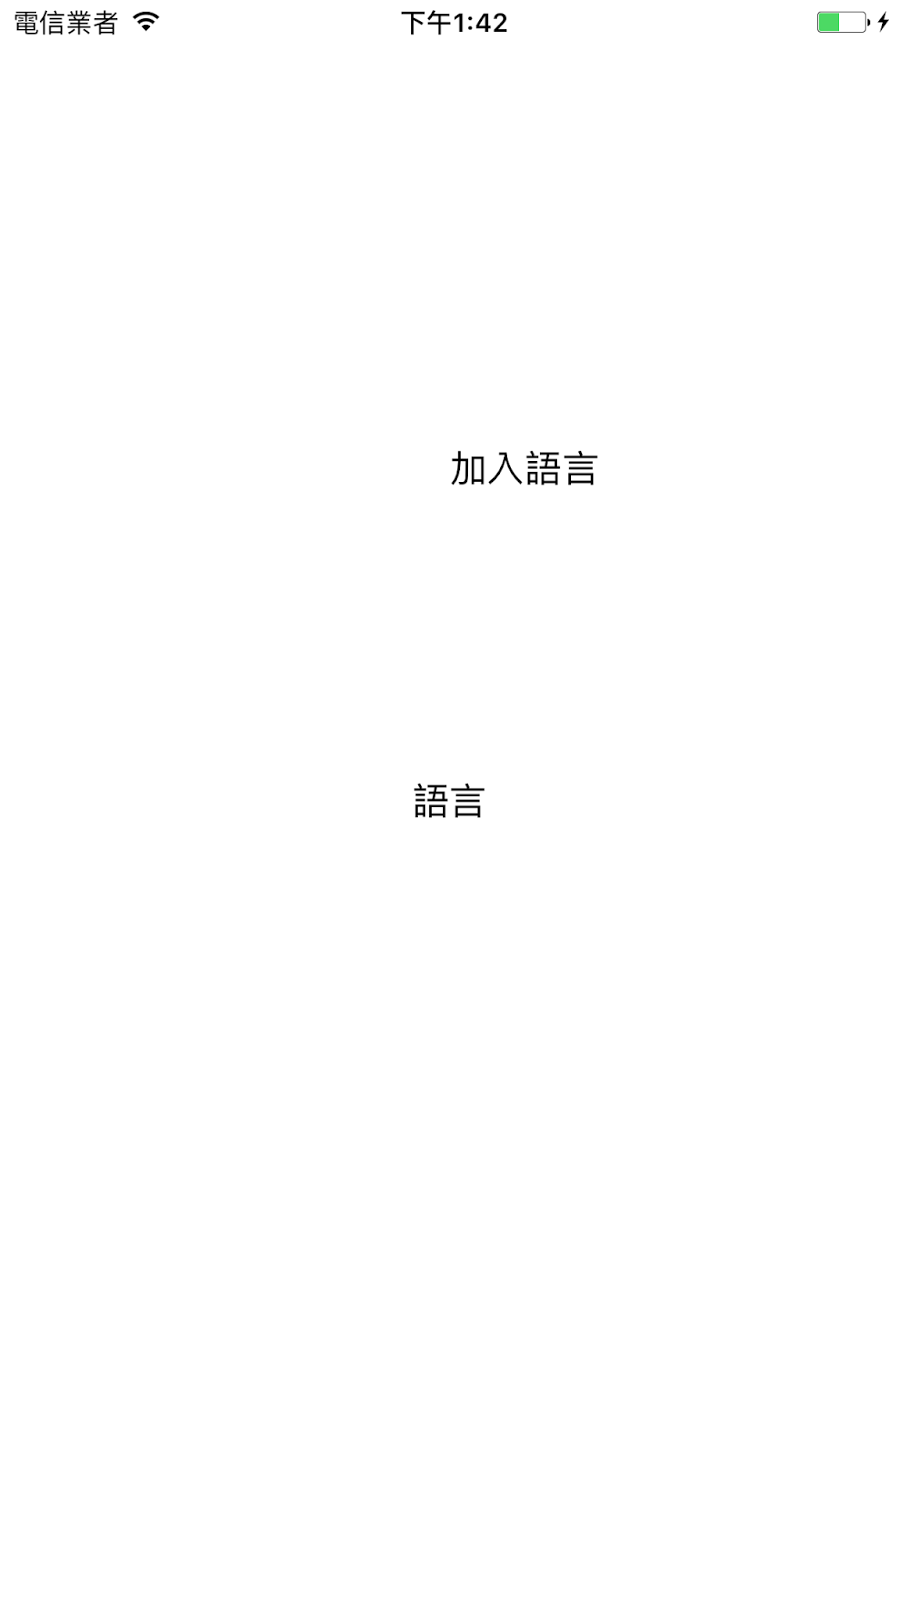
呈現出來結果如下:
小提醒:自己建立的key:vaule要注意一定要加入;要不然會有error喔

雖然很簡單,但我就遇過專案怎麼搞都沒有成功過T.T
最後還是建立全新的專案重做才正常。。。
寫的不是很好但希望有幫助參考這篇的你


swift 手勢動作回上一頁

今天要做的是手勢動作回到上一頁,會需要俄未作此動作的原因通常是因為沒有使用NavigayionController的情況下。不然一般如有使用原生就已經幫你做好了

剛好專案因某些設計問題沒有使用到NavigationController,又加上大多數用戶因方便已慣性使用手勢動作(左邊滑向右邊)就可返回上一頁,故花了點時間找資料。
參考連結如下:https://www.hackingwithswift.com/example-code/uikit/how-to-detect-edge-swipes

要怎麼做呢???這是純code的做法
所使用到的是UIPanGestureRecognizer中的方法

首先在viewdidload內執行
let edgePan = UIScreenEdgePanGestureRecognizer(target: self, action: #selector(screenEdgeSwiped))
        edgePan.edges = .left
        

        view.addGestureRecognizer(edgePan)

然後再建立一個func來執行動作
 func screenEdgeSwiped(_ recognizer: UIScreenEdgePanGestureRecognizer) {
        if recognizer.state == .recognized {
            print("Screen edge swiped!")
            let V1 = self.storyboard?.instantiateViewController(withIdentifier: "V1")
            self.present(V1!, animated: true, completion: nil)
        }
    }
這樣就完成了回到上一頁的手勢動作摟~