存取欄位資料
Swift 3
2016/11/16補充
今天補充swift3在其他class時使用UserDefaults取出原本以存入的資料
首先可先建立一個新的class,在這我直接建立兩個新的label及一個button
button內所做的就是將原本前一個class已經輸入的資料呼叫出來並輸入新建立的label
當我們存入資料時是使用UserDefaults.standard.setValue(Any?, forKey: String)
呼叫資料時使用UserDefaults.standard.string(forKey: String)
@IBOutlet weak var passwordLabel: UILabel!
@IBOutlet weak var IdLabel: UILabel!
@IBAction func loadingBtn(_ sender: UIButton) {
IdLabel.text = UserDefaults.standard.string(forKey: "id")
passwordLabel.text = UserDefaults.standard.string(forKey: "pas")
}
-------------------------------------------------虛線以上為補充----------------------------------------------------
import UIKit
class ViewController: UIViewController,UITextFieldDelegate {
@IBOutlet weak var ID: UITextField!
@IBOutlet weak var PassWord: UITextField!
var UserDef:UserDefaults!
var Id:String!
var pas:String!
var info:String!
var info2:String!
override func viewDidLoad() {
super.viewDidLoad()
// Do any additional setup after loading the view, typically from a nib.
ID.delegate = self
PassWord.delegate = self
// ID.enablesReturnKeyAutomatically = true
// PassWord.enablesReturnKeyAutomatically = true
UserDef = UserDefaults.standard
}
override func didReceiveMemoryWarning() {
super.didReceiveMemoryWarning()
// Dispose of any resources that can be recreated.
}
@IBAction func OKButton(sender: UIButton) {
Id = ID.text;
pas = PassWord.text;
UserDef.setValue(Id, forKey: "id")
UserDef.setValue(pas, forKey: "pas")
info = UserDef.string(forKey: "id");
info2 = UserDef.string(forKey: "pas");
// print(info)
// print(info2)
}
@IBAction func PrintButton(sender: UIButton) {
let leable:UILabel = UILabel.init(frame: CGRect(x: 50, y: 200, width: 100, height: 36));
leable.backgroundColor = UIColor.red
let leable2:UILabel = UILabel.init(frame: CGRect(x: 50, y: 237, width: 100, height: 36));
leable2.backgroundColor = UIColor.red
if let userID = UserDef.string(forKey: "id"){
leable.text = userID
self.view.addSubview(leable);
}else{
leable.backgroundColor = UIColor.blue
}
if let aaa = UserDef.string(forKey: "pas"){
leable2.text = aaa
self.view.addSubview(leable2)
}else{
leable2.backgroundColor = UIColor.blue
}
}
}
Swift 2.3
import UIKit
class ViewController: UIViewController,UITextFieldDelegate {
@IBOutlet weak var ID: UITextField!
@IBOutlet weak var PassWord: UITextField!
var UserDef:NSUserDefaults!
var Id:String!
var pas:String!
var info:String!
var info2:String!
override func viewDidLoad() {
super.viewDidLoad()
// Do any additional setup after loading the view, typically from a nib.
ID.delegate = self
PassWord.delegate = self
// ID.enablesReturnKeyAutomatically = true
// PassWord.enablesReturnKeyAutomatically = true
UserDef = NSUserDefaults.standardUserDefaults()
}
override func didReceiveMemoryWarning() {
super.didReceiveMemoryWarning()
// Dispose of any resources that can be recreated.
}
@IBAction func OKButton(sender: UIButton) {
Id = ID.text;
pas = PassWord.text;
UserDef.setValue(Id, forKey: "id")
UserDef.setValue(pas, forKey: "pas")
info = UserDef.stringForKey("id");
info2 = UserDef.stringForKey("pas");
print(info)
print(info2)
}
@IBAction func PrintButton(sender: UIButton) {
let leable:UILabel = UILabel.init(frame: CGRect(x: 50, y: 200, width: 100, height: 36));
leable.backgroundColor = UIColor.redColor()
let leable2:UILabel = UILabel.init(frame: CGRect(x: 50, y: 237, width: 100, height: 36));
leable2.backgroundColor = UIColor.redColor()
if let userID = UserDef.stringForKey("id"){
leable.text = userID
self.view.addSubview(leable);
}else{
leable.backgroundColor = UIColor.blueColor()
}
if let aaa = UserDef.stringForKey("pas"){
leable2.text = aaa
self.view.addSubview(leable2)
}else{
leable2.backgroundColor = UIColor.blueColor()
}
}
}
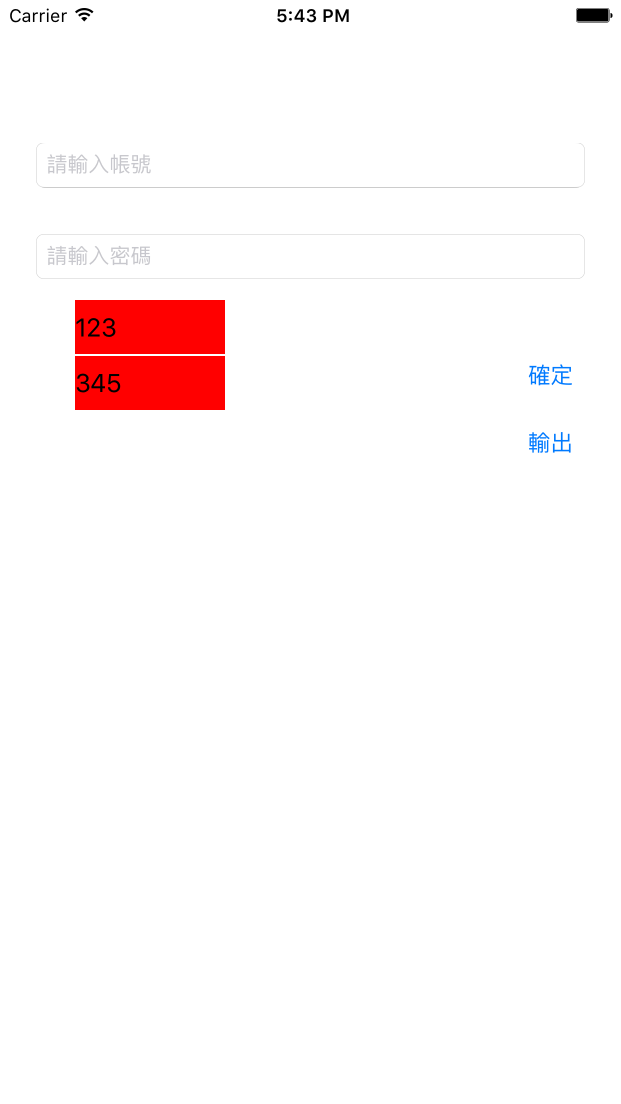
第一次輸入後畫面如下
將APP玩全關必後開起在值接按書出後顯是如下
如按下輸出後沒顯示出來label被景為藍色時表示存取沒有成功或資料是空